Connecting a custom UI to a driver
While the test widget is very convenient is not good enough for visually attractive applications. You can design you own custom user interface using Qt Designer and then connect it to your driver in a very simple way. Consider the following interace for our custom signal generator.
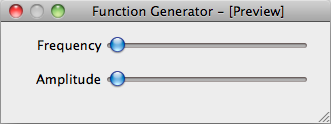
You can set the frequency and amplitude using sliders. The sliders are named frequency and amplitude.
For educational purposes, we show you three ways to do this. You will certainly use only the last and shortest way but showing you how it is done allows you to understand what is going on.
The long way
You can connect each relevant driver Feat to the corresponding widget:
import sys

# Import Qt related from lantz so it worsk with PyQt4 or PySide ...
from lantz.utils.qt import QtGui

# From lantz we import the driver ...
from lantz.drivers.examples.fungen import LantzSignalGenerator

# and a function named connect_feat that does the work.
from lantz.ui.widgets import connect_feat

app = QtGui.QApplication(sys.argv)

# We load the UI from the QtDesigner file. You can also use pyuic4 to generate a class.
main = QtGui.loadUi('connect_test.ui')

# We get a reference to each of the widgets.
frequency_widget = main.findChild((QtGui.QWidget, ), 'frequency')
amplitude_widget = main.findChild((QtGui.QWidget, ), 'amplitude')

with LantzSignalGenerator('TCPIP::localhost::5678::SOCKET') as inst:

    # We connect each widget to each feature
    # The syntax arguments are widget, target (driver), Feat name
    connect_feat(frequency_widget, inst, 'frequency')
    connect_feat(amplitude_widget, inst, 'amplitude')
    main.show()
    exit(app.exec_())
and that is all. Under the hood connect_feat is:
1.- Wrapping the widget to make it Lantz compatible.
2.- If applicable, configures minimum, maximum, steps and units.
3.- Add a handler such as when the widget value is changed, the Feat is updated.
4.- Add a handler such as when the Feat value is changed, the widget is updated.
The short way
If you have named the widgets according to the Feat name as we have done, you can save some typing (not so much here but a lot in big interfaces):
import sys

# Import Qt related from lantz so it worsk with PyQt4 or PySide ...
from lantz.utils.qt import QtGui

# From lantz we import the driver ...
from lantz.drivers.examples.fungen import LantzSignalGenerator

# and a function named connect_driver that does the work.
from lantz.ui.widgets import connect_driver

app = QtGui.QApplication(sys.argv)

# We load the UI from the QtDesigner file. You can also use pyuic4 to generate a class.
main = QtGui.loadUi('connect_test.ui')

with LantzSignalGenerator('TCPIP::localhost::5678::SOCKET') as inst:

    # We connect the parent widget (main) to the instrument.
    connect_driver(main, inst)
    main.show()
    exit(app.exec_())
Notice that now we do not need a reference to the widgets (only to the parent widget, here named main). And we call connect_driver (instead of connect_feat) without specifying the feat name. Under the hood, connect_driver is iterating over all widgets and checking if the driver contains a Feat with the widget name. If it does, it executes connect_feat.
The shortest way
As this is a commont pattern, we have a useful function for that:
import sys

# From lantz we import the driver ...
from lantz.drivers.examples.fungen import LantzSignalGenerator

from lantz.ui.app import start_gui

with LantzSignalGenerator('TCPIP::localhost::5678::SOCKET') as inst:
    start_gui('connect_test.ui', inst, sys.argv)